In recent years, interest in eco-friendly living has grown rapidly. More people are searching for simple, meaningful ways to reduce their environmental impact—and one of the easiest places to start is right in the kitchen.
Food waste is one of the biggest contributors to global waste and greenhouse gas emissions. When we toss food scraps into the trash, they usually end up in landfills where they decompose without oxygen, releasing methane—a potent contributor to climate change.
“If you throw away food scraps, you’re missing a golden opportunity to nourish your soil.”
Home composting transforms those everyday leftovers into something valuable: nutrient-rich compost that feeds your plants, supports your garden, and helps the planet—all while reducing your household waste.
In this guide, you’ll learn everything you need to know to start composting at home. From choosing the right method for your space to understanding what materials to use, this step-by-step introduction is designed to make composting simple, effective, and rewarding—even for complete beginners.
What Is Home Composting?
Home composting is the process of turning everyday organic waste—like fruit peels, vegetable scraps, and yard trimmings—into a natural, nutrient-rich material that can be added to soil. It’s an easy and effective way to recycle waste right where you live, reducing what goes into your trash and enriching your garden or plants at the same time.
At its core, composting is nature’s recycling system. It works through the activity of microorganisms like bacteria and fungi, which break down organic matter when the right conditions are present: oxygen, moisture, warmth, and time. These microbes feed on your waste and, in the process, transform it into a dark, crumbly substance known as compost.The result? A natural soil conditioner full of nutrients that improves soil structure, boosts plant growth, and reduces the need for chemical fertilizers. Whether you live in a house with a garden or an apartment with a small balcony, home composting makes it possible to turn your kitchen scraps into something truly valuable.
Why You Should Compost at Home
Composting at home may seem like a small act, but it carries a powerful impact—for the planet, your home, and even your personal habits. Here’s why it’s worth getting started:
Environmental Benefits
Composting is one of the most effective ways to divert organic waste from landfills. When food scraps and yard waste are sent to landfills, they break down without oxygen and release methane, a greenhouse gas that’s far more potent than carbon dioxide. By composting, you’re helping to reduce greenhouse gas emissions and contributing to a healthier environment.
Household Benefits
Composting isn’t just good for the Earth—it’s great for your home too. The finished product, compost, acts as a free, natural fertilizer for your plants, gardens, or lawn. Plus, by recycling your food waste, you’ll notice a reduction in trash volume and unpleasant odors in your garbage bin. Less waste means fewer trips to the curb and less clutter in your kitchen.
Personal Impact
On a personal level, composting encourages mindful consumption. You begin to see food not just as something to eat, but as part of a full life cycle that continues even after the meal is done. It’s also a fantastic learning tool for families with children, offering hands-on education about sustainability, biology, and environmental responsibility.
What You Can and Can’t Compost
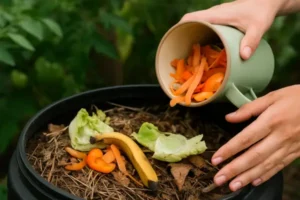
Knowing what materials belong in your compost bin is key to maintaining a healthy, balanced compost pile. Composting relies on a mix of two main types of materials: greens and browns. Getting this balance right helps speed up decomposition and prevents odors or pests.
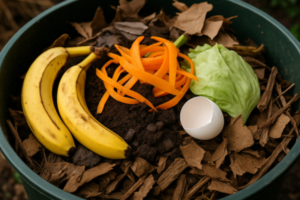
Green Materials (Nitrogen-rich)
These are fresh, moist items that provide nitrogen, which feeds the microorganisms in your compost pile. Common green materials include:
- Fruit and vegetable peels
- Coffee grounds and filters
- Tea bags (unbleached and plastic-free)
- Grass clippings
- Plant trimmings
Brown Materials (Carbon-rich)
These are dry, fibrous materials that provide carbon, giving your compost structure and helping with airflow. Good examples include:
- Dry leaves
- Shredded cardboard
- Newspaper and plain paper (no gloss)
- Sawdust from untreated wood
- Paper towels and napkins (if not greasy)
What to Avoid Composting
Some items should never go in your compost bin, as they can attract pests, cause odors, or introduce harmful bacteria. Avoid composting:
- Dairy products (milk, cheese, yogurt)
- Meat, bones, and fish
- Greasy or oily foods
- Pet waste (from cats or dogs)
- Synthetic or coated materials (plastic, foil, glossy paper)
Being mindful of what goes into your compost ensures a safe, effective, and eco-friendly process—from start to finish.
Choosing Your Composting Method
One of the great things about composting is its flexibility—you can choose a method that suits your space, lifestyle, and level of involvement. Whether you have a backyard or live in a small apartment, there’s a composting option that will work for you.
Outdoor Methods
If you have access to an outdoor area, you can choose from a few low-maintenance options:
- Compost Pile: The simplest method. Just start a heap in a corner of your yard, layering greens and browns. It requires occasional turning but offers plenty of space and is cost-free.
- Compost Bin: A contained version of a pile, compost bins help keep things tidy and shield the compost from animals or harsh weather. They come in a variety of sizes and materials.
- Tumbler Composter: A rotating bin that makes mixing and aerating your compost easier and faster. Tumblers are great for those who want quicker results with less effort.
Indoor Methods
No yard? No problem. Composting indoors is totally doable—and clean—when done right:
- Countertop Compost Bin: A small bin to collect daily food scraps. Many people pair it with an outdoor system or use it as a holding space before transferring to a larger compost area.
- Vermicomposting (Worm Bin): A compact, odor-free option that uses red wiggler worms to break down organic waste. Perfect for apartments, balconies, or even under the kitchen sink.
How to Choose the Best Method
The best composting method depends on your space, time, and goals.
- Have a yard and lots of garden waste? Go for an outdoor pile or bin.
- Live in a small space and want something clean and compact? Try vermicomposting.
- Prefer something hands-off? A compost tumbler could be ideal.
No matter which method you choose, the most important step is simply getting started.
Setting Up Your Composting System
Once you’ve chosen your composting method, it’s time to set everything up. Whether you’re using a backyard bin or an indoor worm system, a few simple steps will get your compost working efficiently from the start.
1. Choose a Location
Pick a spot that’s convenient and practical. For outdoor composting, choose a location with good drainage, partial sunlight, and easy access. For indoor setups, make sure the space is well-ventilated and away from heat sources or direct sunlight.
2. Add a Base Layer (Browns)
Start your compost with a layer of carbon-rich “browns” like dry leaves, shredded cardboard, or straw. This layer helps with airflow and absorbs excess moisture as your pile begins to grow.
3. Begin Layering Greens and Browns
As you collect compostable materials, alternate layers of greens (like fruit scraps and coffee grounds) with browns (like paper or sawdust). Maintaining a balanced mix is key—aim for 2 to 3 parts browns for every 1 part greens to avoid odors and keep microbes happy.
4. Keep It Moist—Like a Wrung-Out Sponge
Your compost needs moisture to support decomposition. The pile should feel damp but not soggy. If it’s too dry, sprinkle a little water. If it’s too wet, add more browns to absorb the excess.
5. Turn or Mix Regularly for Aeration
Oxygen is essential for healthy compost. Every week or two, stir the pile or rotate the bin to allow airflow and activate the decomposition process. This also helps prevent clumping and bad smells.
6. Watch for Signs of Balance
A healthy compost system should smell earthy—not sour or rotten. You’ll know it’s balanced when it’s breaking down gradually, doesn’t smell bad, and attracts natural decomposers like worms and insects (especially in outdoor bins).
How to Maintain a Healthy Compost Pile
Starting a compost pile is easy—but keeping it healthy is the key to fast, odor-free decomposition. With just a little maintenance, your compost will stay active, balanced, and productive.
Balance Your Greens and Browns
Maintaining the right ratio of nitrogen-rich greens to carbon-rich browns is essential. Too many greens (like food scraps) can make the pile wet and smelly. Too many browns (like dry leaves or paper) can slow down the process. Aim for a ratio of about 1 part greens to 2–3 parts browns for optimal results.
Turn the Pile Regularly
To keep the compost oxygenated and decomposing efficiently, turn or stir the pile every 1 to 2 weeks. This introduces fresh air, redistributes moisture, and helps break down materials faster. If you’re using a compost tumbler, just give it a few spins every few days.
Troubleshooting Common Composting Issues
Even well-managed piles can run into occasional issues. Here’s how to fix the most common problems:
- Bad smell?
This usually means your pile has too many greens or is too wet. Add more browns like shredded paper or dry leaves, and give it a good mix to introduce air. - Too dry?
If your pile looks dusty and decomposition has slowed, add water and some moist greens (like fruit peels). The texture should feel like a wrung-out sponge. - Not decomposing?
Your compost might need more oxygen or smaller pieces. Turn the pile, and consider chopping larger items into smaller bits to help them break down faster.
When and How to Use Finished Compost
After weeks (or months) of careful layering, turning, and balancing, your compost will eventually be ready to use. But how do you know when it’s done?
How to Tell When Compost Is Ready
Finished compost is easy to recognize. It should be:
- Dark brown or black in color
- Crumbly in texture
- Smelling earthy and fresh (like forest soil) You shouldn’t be able to identify any original food scraps, and it should no longer generate heat.
Where to Use It
Once your compost is ready, there are countless ways to put it to good use around your home and garden:
- Garden Beds
Mix compost into vegetable or flower beds to improve soil structure, fertility, and moisture retention. It’s especially helpful before planting or during seasonal soil prep. - Potted Plants
Blend compost into potting soil for indoor or outdoor containers. It provides essential nutrients and helps retain water, especially in fast-drying pots. - Lawns and Landscaping
Sprinkle a thin layer of compost over your lawn to naturally fertilize and strengthen the grass. You can also use it around trees and shrubs to nourish the root zones. - As Mulch or Soil Amendment
Spread compost around the base of plants like mulch, or dig it into the soil to enrich tired garden beds. It improves drainage, supports microbial life, and boosts long-term soil health.
Tips for Composting Success
Whether you’re just starting out or looking to improve your composting routine, a few simple tips can make the process smoother, faster, and more enjoyable.
Chop Materials for Faster Breakdown
The smaller the pieces, the quicker they decompose. Chop fruit and vegetable scraps, break down cardboard, and shred dry leaves when possible. This increases the surface area for microbes to work their magic and helps speed up the entire composting process.
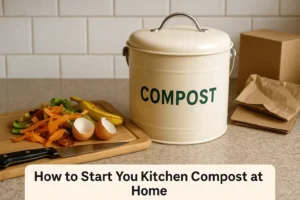
Keep a Kitchen Compost Caddy
A countertop compost caddy makes collecting scraps easy and convenient. Choose one with a lid and a charcoal filter to control odors. Empty it into your main compost bin regularly and rinse it out to keep it clean.
Don’t Stress—Composting Is Forgiving
Composting doesn’t have to be perfect. Forgot to turn the pile? Added too many greens? No worries! Most compost issues can be fixed with a few small adjustments. Nature is incredibly resilient—just keep going and stay consistent.
Involve the Family to Build Sustainable Habits
Composting is a great way to teach kids (and adults!) about sustainability, food waste, and nature’s cycles. Make it a fun, shared activity by assigning roles like “scrap collector” or “compost turner.” It’s a small habit that can have a big impact—especially when practiced together.
Conclusion
Composting at home is one of the simplest and most rewarding ways to live more sustainably. With just a few scraps, some dry leaves, and a little patience, you can turn everyday waste into something powerful and life-giving for your soil and the planet.
From reducing landfill waste to creating your own free fertilizer, the benefits of composting go far beyond your kitchen. It’s a small habit with a big impact—and it doesn’t take much to get started.
“You don’t need to be a gardener to start composting—just a little curiosity and a banana peel.”
So why wait? Set up a bin, collect your scraps, and take that first step today. Your garden, your community, and the Earth will thank you.
Frequently Asked Questions (FAQ)
Still have questions? You’re not alone! Here are some of the most common concerns beginners have when starting to compost:
Do I need a big backyard to compost?
Not at all. Composting can be done in many different types of spaces. If you have a backyard, great — you can start a pile or use a compost bin. But even in a small apartment, options like indoor compost bins or vermicomposting (worm composting) make composting completely possible. The key is to find a method that suits your living space.
Will composting attract pests?
Only if it’s not properly maintained. A balanced compost system shouldn’t smell bad or attract rodents or insects. Avoid placing meat, dairy, or greasy foods in your bin, and always cover fresh food scraps with a layer of dry materials like leaves or cardboard. This helps control odor and keeps pests away. Closed compost bins or tumblers offer even more protection, especially in urban or outdoor settings.
Can I compost in the winter?
Yes. Composting still happens during winter, although at a slower pace due to lower temperatures. To keep the process active, you can insulate your compost pile with dry leaves, straw, or a tarp. You can also move your bin to a sheltered area like a garage or covered balcony. Indoor vermicomposting is also a great alternative during the colder months.
How long does it take for compost to be ready?
It depends, but generally it takes between 2 to 6 months. Factors like temperature, moisture, the proper balance of greens and browns, and how often you turn the pile all influence the speed of the process. The more balanced and well-maintained your compost system is, the faster you’ll get rich, usable compost.